


This is coconut matting (coir matting) which I find aesthetically pleasing because it is a natural fibre. Coir comes from the coconut husk and is very hard wearing - it's one of the greenest flooring types out there.
Storage
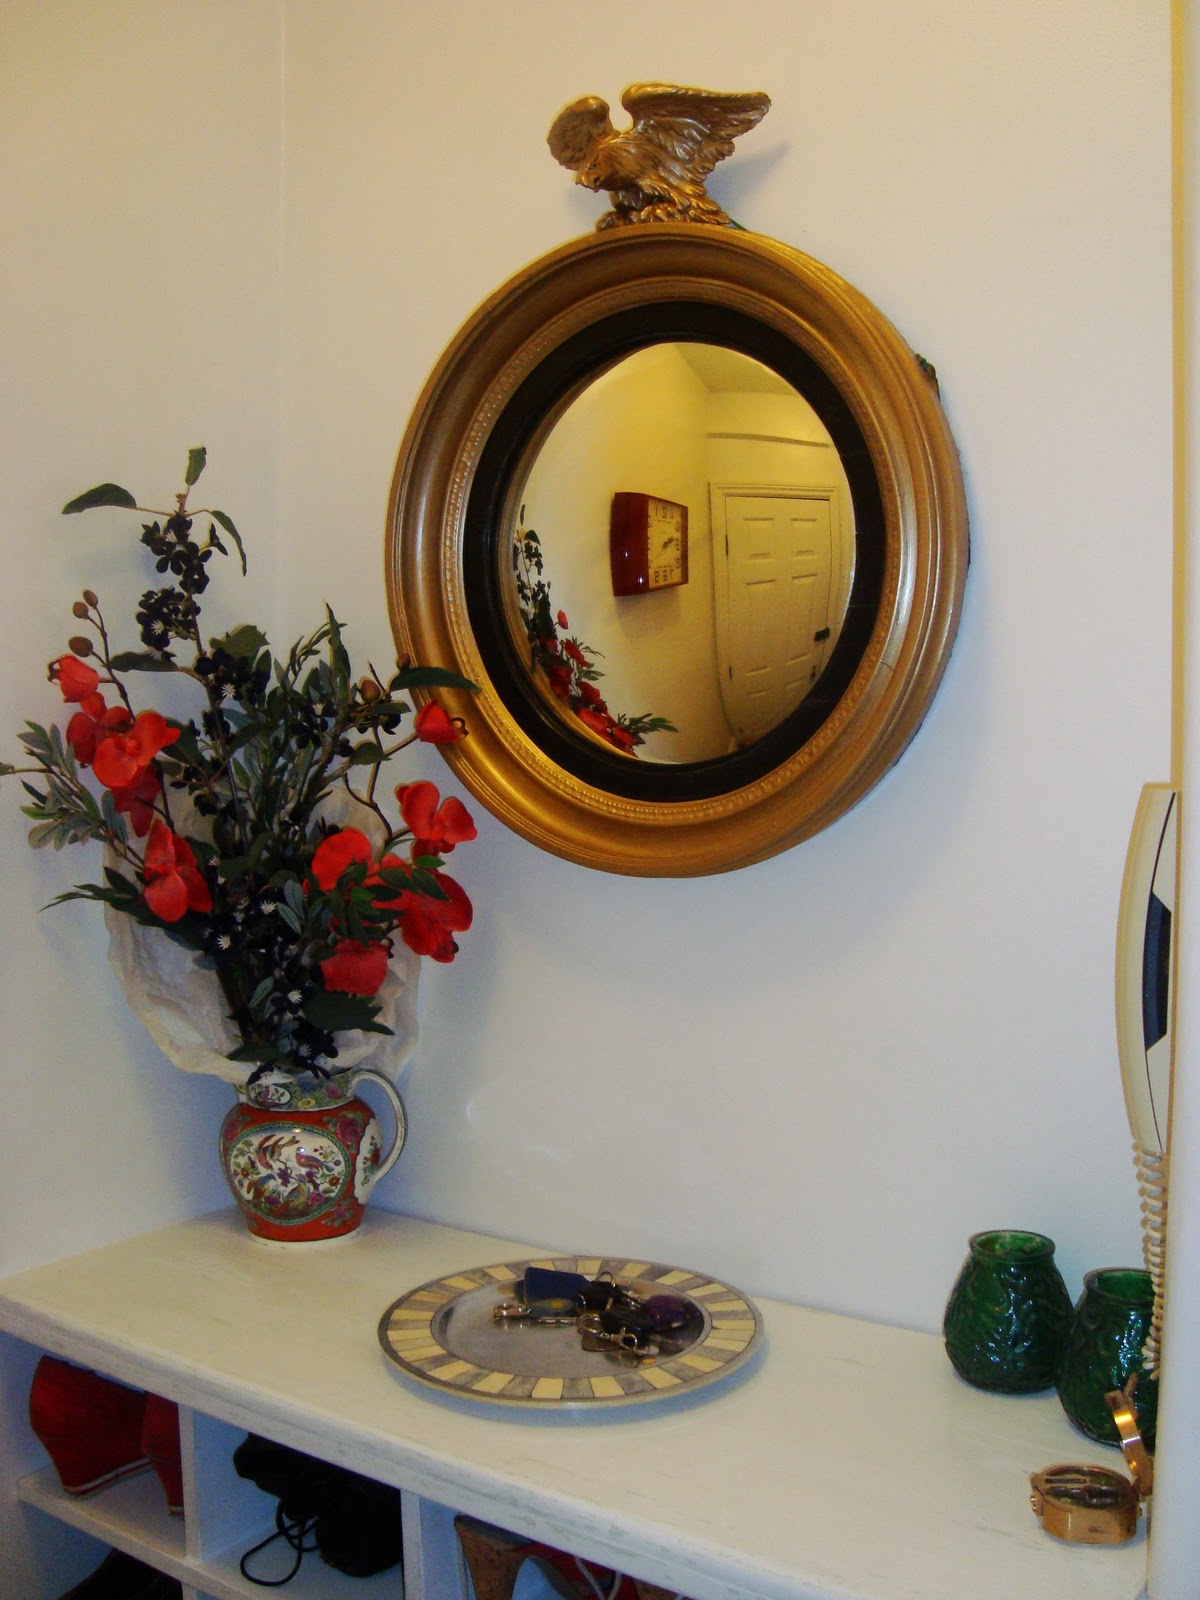
My next task was to sort out the storage issue. People coming in and dumping shoes by the door just caused too much clutter. There is a small alcove by the front door in which I have kept a wire shoe rack for convenience however, it did not look attractive! I have spent a long time thinking about how I can use this space considering shelves and hall stands but the alcove was so shallow that I was afraid that the shelves would be useless and the hall stand would jut out too far (especially because the fuse box and gas shut off valve in the base of the alcove).
Mood Board
After some research I knew what sort of look I was after - I wanted a convex gold mirror, some colour and plenty of storage for our shoes. (Look out for my kitchen mood board and what I did with that - I'll write soon).

Eventually I decided to try my first wood work project. This is what I came up with:

Making something myself meant that I could work around the shut off valve and the fuse box to make something that was useful to me. It is made purely from MDF, pieces of dowling rod and wood glue. Once I had finished the construction and sanded everything down I set about giving it a shabby chic look.
Shabby Chic Paint Effect
 I started the paint effect by painting the edges and places that would naturally wear and tear with a typical shabby chic colour - I chose a beautiful pale green. Once this had dried, I applied two coats of a white tone in satin wood and let this dry completely.
  Then the fun began - sanding! Just using a fine piece of sand paper, I sanded off some of the paint to achieve the desired effect. The final stage of this process was to apply a light touch a beeswax.
The last part was dressing the new shoe rack. I found this old (slightly chipped) jug and adorned it with some artificial flowers. This convex mirror was in a terrible state and so it was put back together, painted gold and an eagle added to the top. It all cost pence in the end but I love the effect that they make together. The mirror has two uses, it reflects the light in a windowless corridor but most importantly, it's a fun piece to have at the entrance!
And that's it!
Wow your shoe rack is amazing! I'm very impressed! Are you going to blog any more of your home projects? I like your mood boards, must do that myself ...
ReplyDeleteHi Fiona, thanks for the comment - I might just get going again now the summer is over! I have a few other things that I can add...
ReplyDelete